|
|||||
|
||||||||||
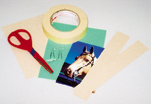
| Focus: Following detailed instructions to make a picture stand. | ||||||||||
|
||||||||||
|
||||||||||
|
%
responses |
||||||||||
|
y8
|
||||||||||
|
brown
card in place at back |
94 |
|||||||||
|
picture
is centred |
93 |
|||||||||
|
green
card used as frame, not backing |
64 |
|||||||||
| FRAME: |
cut
as per diagram |
38 |
||||||||
|
errors
in width of frame on 1 or 2 sides |
6 |
|||||||||
|
frame irregular, haphazard |
23 |
|||||||||
|
missing
side or no hole cut |
33 |
|||||||||
| ASSEMBLY OF PICTURE: |
held together as shown |
77 |
||||||||
|
held
together in some other way |
21 |
|||||||||
|
not
held together |
2 |
|||||||||
| BASE: |
appropriate
V shape |
92 |
||||||||
|
both
sides 20cm ± 1cm |
41 |
|||||||||
|
side
linked as shown |
91 |
|||||||||
|
slits
cut 5–7cm from ends |
33 |
|||||||||
|
slits
cut to appropriate angle |
69 |
|||||||||
|
||||||||||

| |
||